Work History

Jon-Morley-West-Yorkshire-Tile-Doctor

Welcome to my Work History archive where you will find detailed examples of Tile, Grout and Stone Cleaning and renovation work carried out within West Yorkshire.

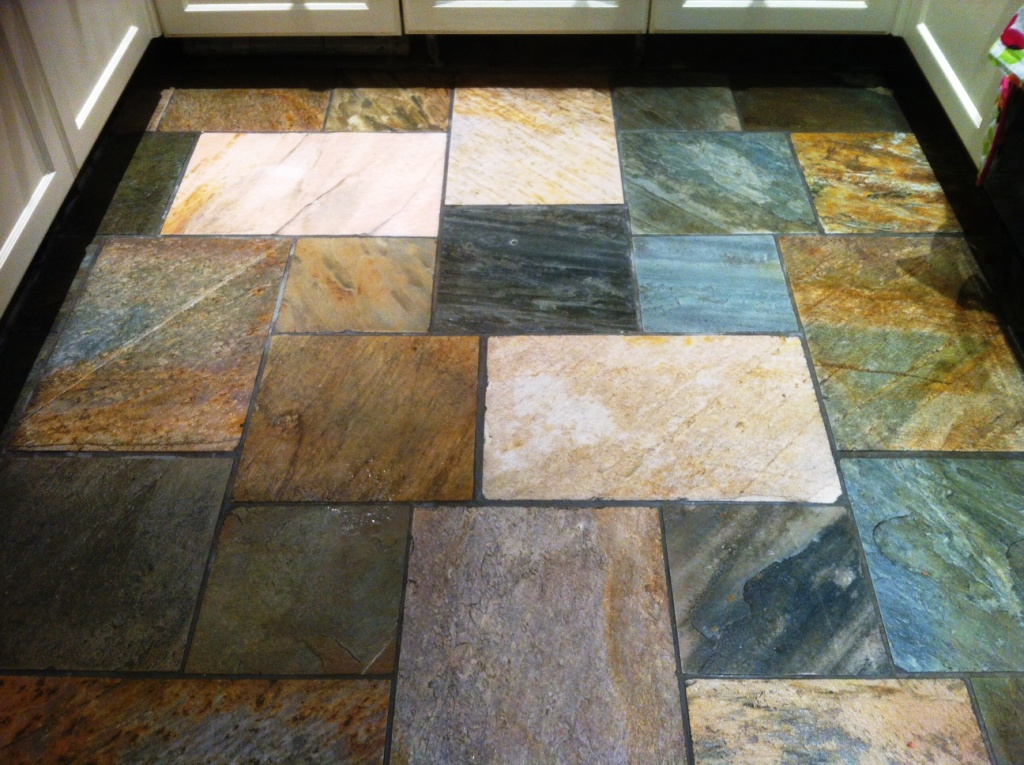
Flood Damaged Slate Tiled Floor Before and After Restoration Calderdale

Flood Damaged Slate Tiled Kitchen Floor Renovated in Cragg Vale

I was contacted by the owners of a cottage in the small village of Cragg Vale who had unfortunately suffered a flood in their kitchen which had resulted in damage to their Slate tiled kitchen floor. Cragg Vale is a very small village situated on the moors above Hebden Bridge in the borough of Calderdale. The cottages were originally built circa 1860 for workers at the local mill. Although the mill has now gone, the cottages are still lived in by people who enjoy living so close to the scenic Blackstone Edge Moors.

Slate Tiled Kitchen Floor Before Cleaning Cragg Vale

It’s difficult to appreciate the problems from the before photo but once I visited the property, I could see where some of the tiles had been damaged by the water leading to flaking and salting. The other major issue that became apparent was that the floor had also been covered in layers of sealant and varnish which had been applied over the years. This had left the overall finish looking a uniformly dark colour although it was very shiny.

After doing some tests and a full survey, I submitted a quote to carry out the work which was to be covered by the owner’s insurance. This was accepted and a date was set to begin the work.

Cleaning a Slate Tiled Kitchen Floor

Given the amount of work involved restoring the Slate, the complex nature of the job and the need to proceed quickly, I recruited the services of South Yorkshire Tile Doctor Matt Lovett. This is one of the benefits of using Tile Doctor as we can combine our skills and equipment to ensure that a job is carried out effectively and efficiently.

This job had the potential to become very messy so our first job on arrival to start work was to protect the kitchen units and adjacent carpets with protective coverings. We then applied a coating of Tile Doctor Remove & Go to small sections of the floor and left it to soak in for fifteen minutes at a time. The tiles were then scrubbed, and the resultant residue removed with a wet vacuum. The varnish proved particularly stubborn in places, so further applications of Remove & Go were scrubbed in using wire brushes to remove it layer by layer. The sealants and varnish turned to a muddy gloop that we continued to scrape up and remove with the wet vac.
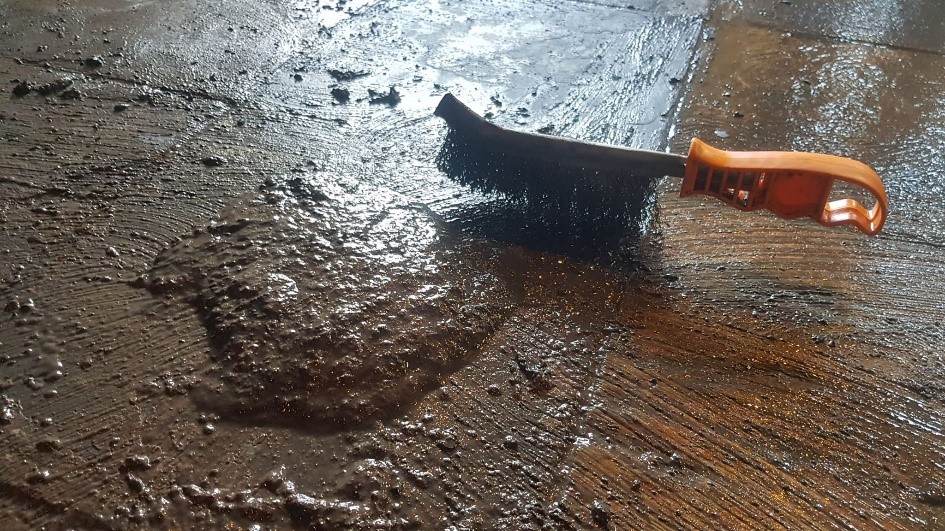
Slate Tiled Kitchen Floor During Cleaning Cragg Vale

At the end of the first day we had removed about 80% of the coatings but knew that we still had long day ahead of us tomorrow.

The next day we reviewed our progress and decided to work in one metre square areas to remove the remaining coatings. This was a time consuming but necessary way to ensure that by the end of the day we had got the floor clean.

Before leaving the floor was rinsed again and dried as much as possible using the wet vacuum. After a final inspection we were happy the floor was ready for sealing and left it to dry off overnight.

Sealing a Slate Tiled Kitchen Floor

First job on day three was to check that the floor was dry enough to begin sealing. This is a very important part of the process because if the floor is damp then the sealers won’t take properly. The floor was fine, so I started with the application of a single coat of Tile Doctor Colour Grow which is a breathable, colour enhancing sealer that penetrates the pores of the stone protecting it from within. Colour grow also enhances the natural colours in the stone thus highlighting its natural beauty.

Slate Tiled Kitchen Floor Before Cleaning Cragg Vale

After 30 minutes, the floor was dry enough to start applying the first coat of Tile Doctor High Shine sealer. This is an acrylic sealant which as the name suggests, gives the floor a glossy shine. This was the effect that the Customer had requested at the beginning of the process.
A further four coats of High Shine were applied before a water test was conducted to ensure that the floor was completely sealed.

The Customer was very pleased and as you can see from the photos, it’s easy to see why.

Slate Tiled Kitchen Floor After Cleaning Cragg Vale


Sealing a Slate Tiled Kitchen in West Yorkshire

Flood Damaged Slate Tiled Kitchen Floor Renovated in Cragg Vale Read More »

Victorian Tiled Hallway Floor Renovation Cleckheaton Kirklees

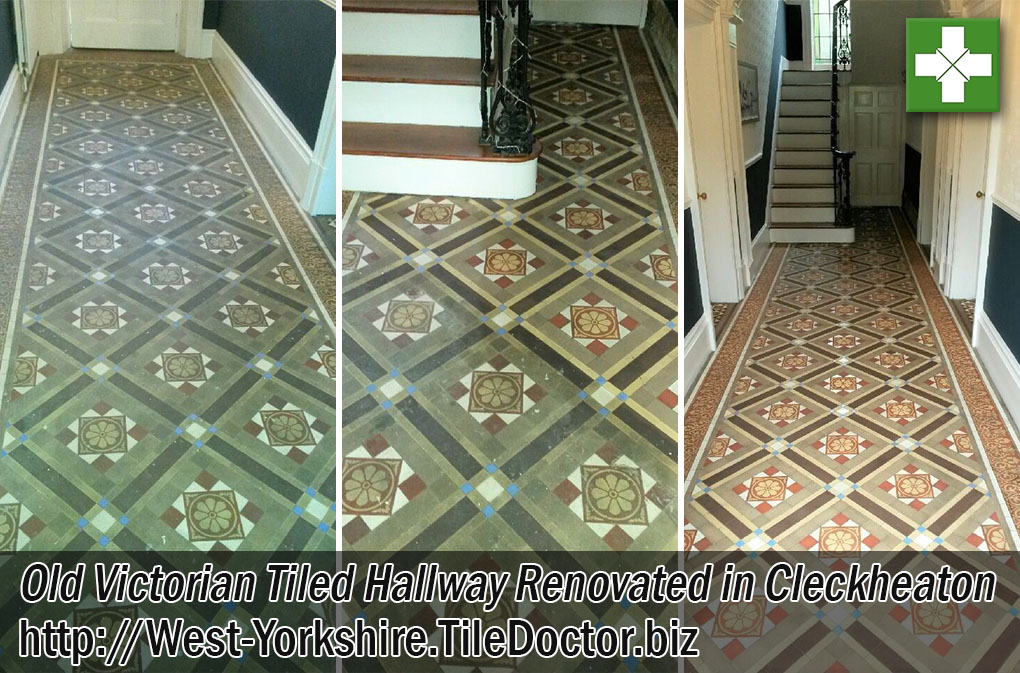
Victorian Tiled Hallway Renovation in Cleckheaton – Kirklees

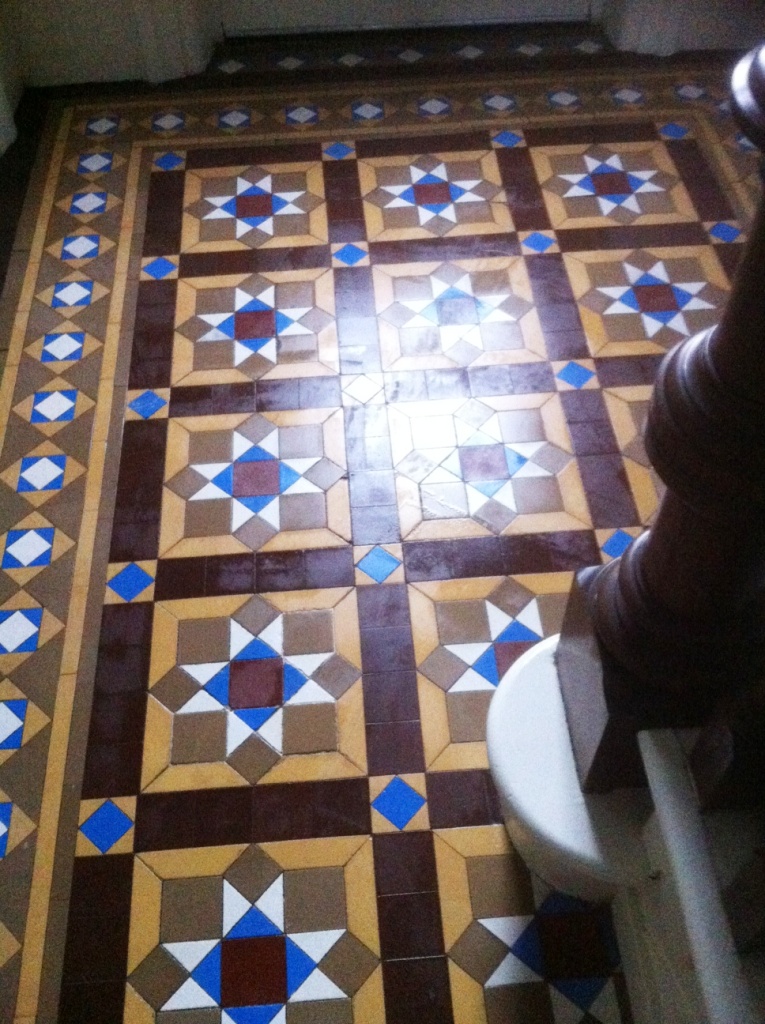
I was asked to visit an old house from the Victorian era in Cleckheaton which is part of the West Yorkshire district of Kirklees and only 14 miles from my base in Oxenhope. The owners had bought the house last year and had been renovating it ever since. The last job was to sort out the Victorian tiled hallway that they knew from the previous owners had been covered by carpet for over 50 years.

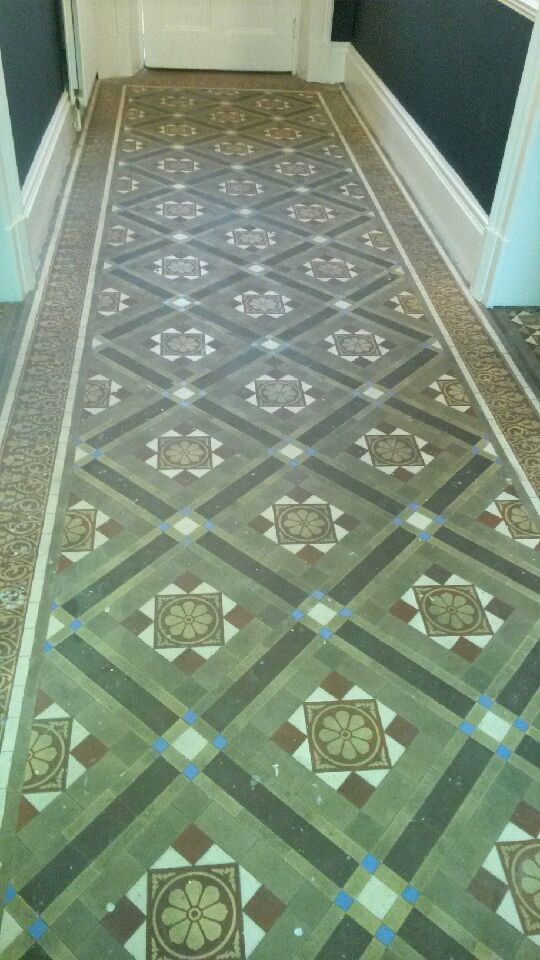
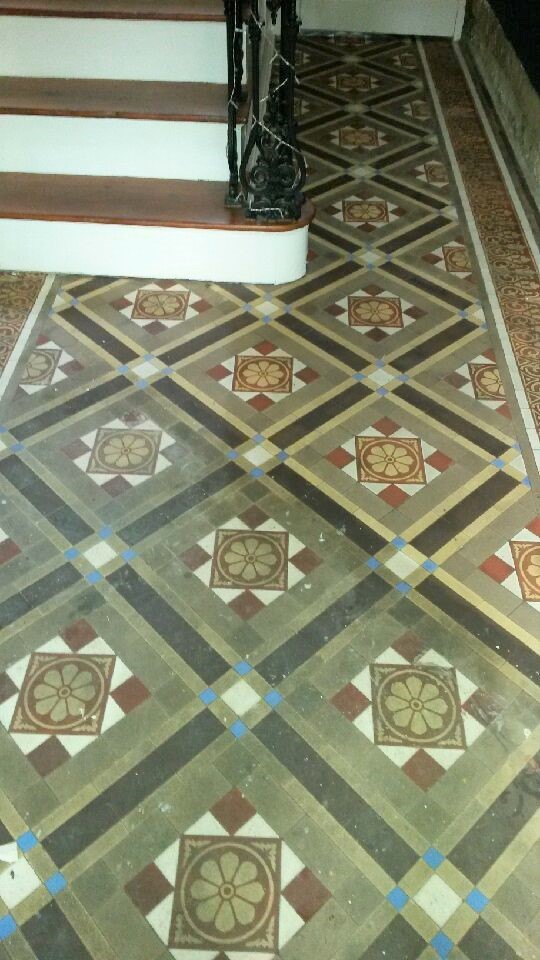
Leaving the floor restoration until last was a sensible decision as the last thing you need is for a decorator to drip paint over your recently renovated floor. I could see the floor was in good physical condition but had layers of dirt, old sealant and of course paint splashes on it but after doing a test clean I knew that we could bring it back to life and return it to something like its former glory.

Victorian Tiled Hallway Before Renovation Cleckheaton Kirklees

The test clean is an important part of our survey as it gives the customer confidence we know what we’re talking about and it gives me a chance to work out the best way of cleaning the floor, so I can provide a more accurate quotation (see below). The owner of the property was impressed with the results of the test clean and keen to have the full potential of the Victorian tiled floor revealed booked me in to do a full clean and seal.

Deep Cleaning a Very Dirty Victorian Tiled Hallway Floor

Normally, we would clean these floors using our rotary machines and chemicals to break down the layers of dirt but in this instance that was not going to be effective. I worked this out during the test clean where I discovered that the tiles were very porous so that any liquid that was put on the floor was immediately absorbed into it. This meant that any chemicals that I applied to the floor did not have time to work before they were absorbed into the floor. When these floors were originally laid there was no damp-proof membrane laid underneath which leaves them very susceptible to damp issues and salting from efflorescence.

After trying a couple of different methods, I decided that the only way to get this floor clean was to use handheld diamond blocks and a small amount of water to clean the floor in very small sections at a time and then immediately remove the residue before it dried back into the floor. This was obviously very time consuming but did remove the dirt very effectively, it also meant that I wouldn’t exacerbate any efflorescence issues which could happen when excessive amounts of water are used.

Victorian Tiled Hallway During Renovation Cleckheaton Kirklees

Once the whole floor was clean it was given an Acid Wash with Tile Doctor Acid Gel to neutralise any potential salting issues. The gel was then rinsed off with water and extracted using a wet vacuum to remove as much moisture as possible from the floor. The now clean floor was then left to dry off thoroughly, so it would be ready for sealing.

Sealing an Old Victorian Tiled Hallway Floor in

A couple of days later I returned and started by checking the moisture levels in a couple of areas to verify that the tiles were dry enough to be sealed. All was well and so I proceeded to seal the floor with a couple of coats of Tile Doctor Colour Grow which is an impregnating sealer that seeps into the pores of the tile protecting it from within. Colour Grow is also a colour enhancing sealer that improves the natural colours in the tile and most importantly it’s a breathable sealer that will allows any moisture rising through the tile to evaporate. Using a breathable sealer is highly recommended for floors with no damp-proof membrane as moisture can become trapped under the tile which over time can cause damp to rise through the walls and even tiles to become loose.

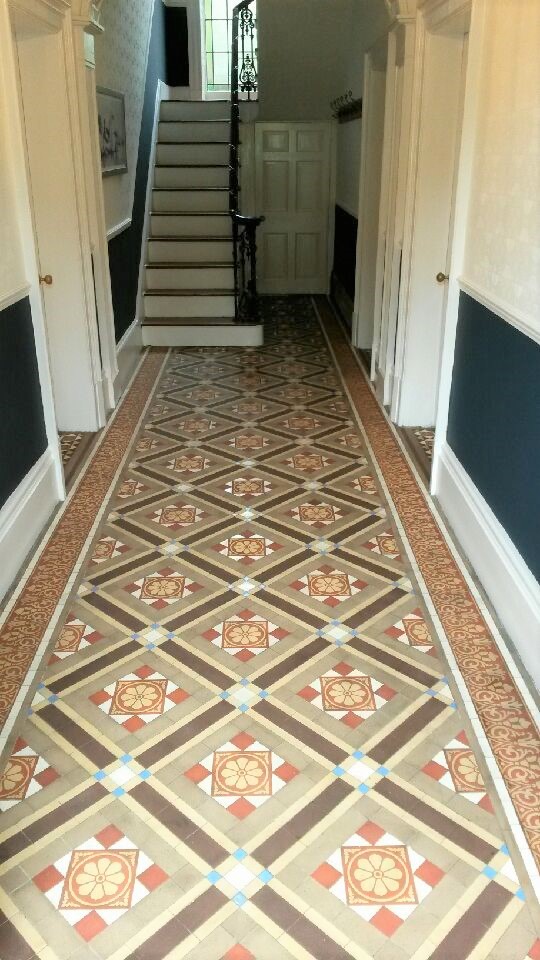
Victorian Tiled Hallway After Renovation Cleckheaton Kirklees

The Customers were very impressed by the transformation in their floor and hopefully you can see from the photos how much of a difference that has been made to the floor.


Professional Restoration of a Victorian Tiled Hallway in West Yorkshire

Victorian Tiled Hallway Renovation in Cleckheaton – Kirklees Read More »

Victorian Tiled Hallway Floor Before and After Cleaning Hebden Bridge

Finishing a Victorian Hallway Floor in Hebden Bridge

The photographs below are of a lovely Victorian tiled hallway that had been repaired and cleaned by another tradesman a his a few months earlier. The workman had left the customer to seal the floor himself, which he had done but the floor ended up looking patchy and dull and he wasn’t happy with the results which didn’t highlight the beautiful colours in the tile. Realising he needed help to achieve the correct finish I was given a call and asked to finish the floor.

Victorian Tiled Hallway Before Cleaning Hebden Bridge

The property was in Hebden Bridge a market town situated between Halifax and Rochdale. After carrying out a survey, I advised that the floor would need re-cleaning to strip off the sealant he had applied and to remove the marks from the floor. We would then be able to re-seal the floor correctly for him. We agreed a price for the job and set a date to carry out the work.

Cleaning a Victorian Tiled Hallway Floor

On the first day we started preparing the hallway to be cleaned by covering the stair carpet and new and expensive wood panelling and skirting boards to protect them from any possible marking during the cleaning process. I then used a 200-grit Diamond burnishing pad attached to a rotary buffing machine to remove the sealant and dirt from the floor. In this instance the pad was applied just with water which is used to lubricate the pad, the resultant slurry is then removed with a wet vacuum. The advantage of using this process as opposed to a chemical clean is that moisture is kept to a minimum which is important on old floors like this where no damp proof membrane exists.

After making sure that the floor was to a standard that I was happy with, I then repeated the process along the edges with a set of hand-held diamond blocks which makes it easier to get into the corners and edges where the machine struggles to reach effectively.

Still concerned about the moisture levels in the floor I decided to give the floor an acid wash using Tile Doctor Acid Gel which will neutralise any alkaline salts in the floor. As I mentioned earlier this is a common problem on floors of this age, they do not usually have a Damp Proof Membrane fitted so moisture is able to rise through the tiles bringing with it salt which gets left on the surface of the tile, this process is more commonly known as Efflorescence. The floor was then rinsed with water and the floor dried as much as possible using the wet vacuum. Finally, I tidied up before leaving for the day and allowing the floor to fully dry out overnight.

Sealing a Victorian Tiled Hallway Floor

Returning the next day, I first took moisture readings to ensure that the floor was dry enough to seal. If a floor is too damp the seal won’t cure properly and therefore won’t be effective. Fortunately, on this occasion the floor was within limits and I could proceed to apply four coats of Tile Doctor Colour Grow sealer allowing around thirty minutes between coats for drying.

Colour Grow is a breathable impregnating sealer that allow moisture to evaporate from the floor whilst also protecting it from dirt and stains. This sealer leaves a matt finish which is what the owner wanted but it also enhances the colours in the tile which really being the floor alive.

Victorian Tiled Hallway After Cleaning Hebden Bridge

The customer was very pleased with the results, the floor looked much cleaner and will be easy for them to maintain. I hope that you can see the difference from the before and after pictures.


Sealing a Victorian Tiled Hallway in West Yorkshire

Finishing a Victorian Hallway Floor in Hebden Bridge Read More »

French Limestone Kitchen Floor Before and After Cleaning and Polishing Eldwick

French Limestone Tiled Floor Cleaned and Polished in Eldwick

I was recently contacted by a lady in the small village of Eldwick near Bingley who wasn’t happy with the condition of her French Limestone floor which had hadn’t been professionally cleaned for some time. The French Limestone tiles had been laid throughout the kitchen and dining room and as you can see in the photograph below now looked dull, dirty and uninviting.

French Limestone Kitchen Floor Before Cleaning and Polishing Eldwick
The floor needed a deep clean and seal to bring it back to its’ best however before I could do that I needed to determine the best method to use. I duly carried out a survey and test clean which showed how the floor could be improved and discussed the quote for the work with the client, they were really pleased with the test area, accepted the quote and we arranged a convenient time to carry out the work the following week.

Deep Cleaning a French Limestone Tiled Floor

Arriving on site a week later, my first task was to cover all the kitchen units with protective covering to protect against splashing. The last thing we want is to cause any damage to the surrounding areas.

The next step was to use a set of diamond burnishing pads from Grits 400 to 1500 to clean and polish the Limestone tiles. The pads are fitted to a rotary buffer and applied in sequence with water to lubricate, the process removes inground dirt and rebuilds the polish on the Limestone. Small hand-held burnishing blocks are used to reach the more intricate areas. The floor is then rinsed with more water after each pad has been used and the resultant residue is removed with a wet vacuum.

Once I was satisfied that the dirt had been removed from the floor, I then worked on the more stubborn grout lines with a strong dilution of Tile Doctor Pro-Clean and a stiff grout brush to get any remaining deposits out of the grout lines. This is a great multi-purpose high alkaline cleaning and stripping product brilliant for heavily soiled and stubborn neglected tiles and very good on very dirty grout. With the grout clean I then applied the last 3000 grit burnishing pad to really bring up the polish on the Limestone floor, this pad is applied dry with a little water sprayed onto the surface of the stone. The floor was then left to dry off completely overnight.

Sealing a French Limestone Tiled Kitchen Floor

The following day I checked that the floor was dry using a moisture meter before applying Tile Doctor Ultra-Seal to the floor. This is a premium, no-sheen, natural-look penetrating sealer which is formulated to provide maximum stain protection, it’s also recommended for busy kitchen areas and is an excellent grout sealer. Once the sealant was dry I did a water drop test to confirm that the floor was properly sealed.

French Limestone Kitchen Floor After Cleaning and Polishing Eldwick
I hope that you can see from the photos the improvement in the appearance of the floor. The client was really happy with the floor which lifted the whole room and made the kitchen like new again.


Professional Renovation of a French Limestone Tiled Floor in West Yorkshire

French Limestone Tiled Floor Cleaned and Polished in Eldwick Read More »
Quartzite Tiled Floor in leeds Before and After cleaning

Dirty Quartzite Tiled floor in a Leeds Kitchen

This Quartzite tiled kitchen floor from a house in Leeds was in need of some attention and as well as a build-up of general dirt it was also affected by cooking oil and Grease. Any sealer that may have been in place had long since worn off and it was time for a good clean and re-seal.

Cleaning Quartzite Tile

I followed the usual process for cleaning floors of this type by applying a dilution of Tile Doctor Pro-Clean, allow it to dwell for a while and then give the floor a good scrub using a rotary machine fitted with a black scrubbing pad. The soiled solution was then removed using a wet vacuum and floor washed down with clean water; sometimes this process needs to be repeated a number of times and often you will need to get into the grout lines by hand with a hard scrubbing brush as a scrubbing pad can float over the surface of the grout.

Quartzite Tiled Floor in leeds during cleaning

Sealing Quartzite Tile

Once the floor was dry it was sealed using two coats of Tile Doctor High Shine Sealer which gives leaves a durable high sheen finish together with stain resistance. There are a number of sealers available in the Tile Doctor range including Seal and Go which has a Low Sheen finish and Colour Grow which helps to bring out the colour in the tile; the final selection is a combination of the customer’s requirements and my guidance.

Quartzite Tiled Floor in leeds after cleaning
 

Quartzite tiled kitchen floor in Leeds cleaned and sealed

Dirty Quartzite Tiled floor in a Leeds Kitchen Read More »

Victorian Floor Before and After Cleaning and sealing

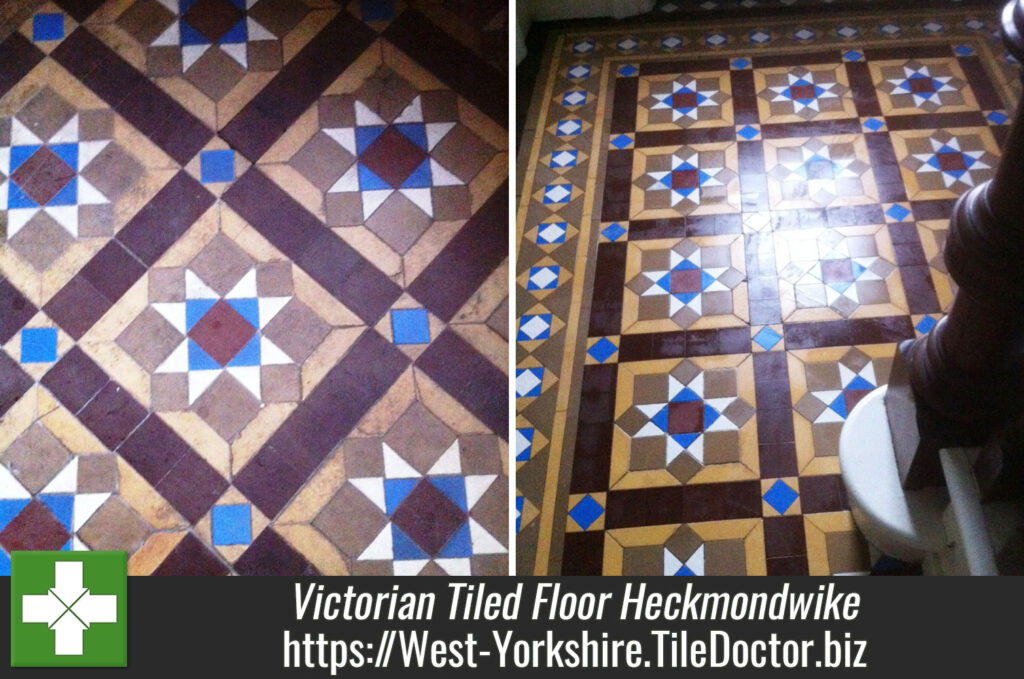
Victorian Tiled Floor stained with Bitumen in Heckmondwike

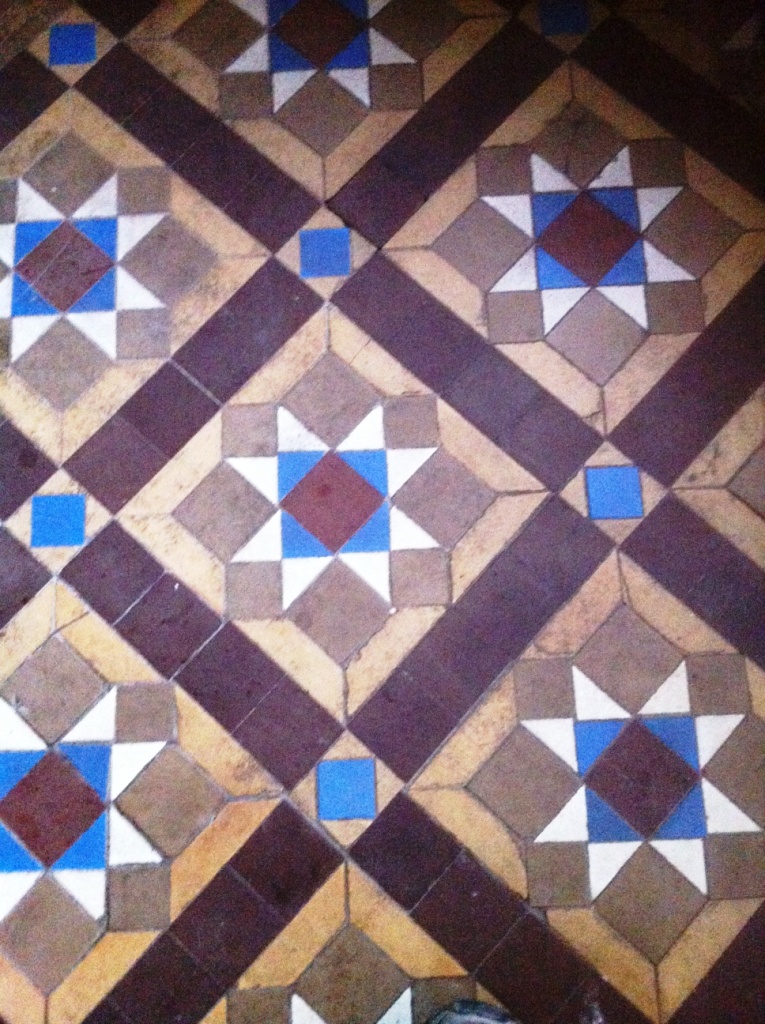
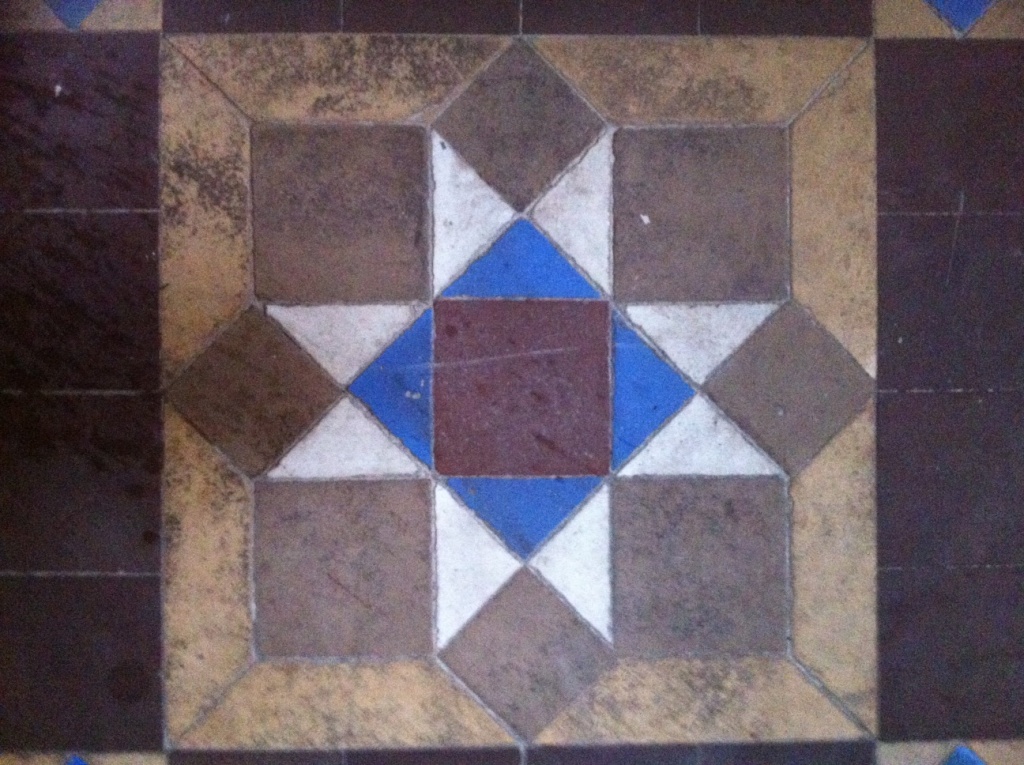
This was a very tough assignment to restore a Victorian Tiled floor in the village of Heckmondwike, West Yorkshire which had been stained with Bitumen. If you look closely at the photographs on this page you should be able to see it; although this may sound unusual Bitumen was used frequently as an adhesive for carpet or linoleum when tiled floors were not so fashionable.

Victorian Floor Before Cleaning
To solve the problem I applied Tile Doctor Remove and Go which is the strongest product we have for removing coatings from tiles, its ideal for removing sealers but it’s also good at removing adhesives, grout haze and paint as well. Once applied I left it to dwell for a while to allow it get to work on the problem before agitating with a rotary machine fitted with a scrubbing pad and manually using a scrubbing brush. The dirty solution was removed using a wet vacuum and washed down with clean water; it was necessary to repeat this process a couple of times and although improved I have to admit although it made a great improvement it wasn’t 100% successful, I have tried some other products and methods on subsequent visits to shift the remaining bitumen staining but you have to be careful not to damage the tile.

Victorian Floor Before Cleaning Closeup

Sealing Victorian Floor Tiles

Tile Doctor Seal and Go was used to seal the floor, it gives a durable low sheen finish that brings a nice depth to the floor and will protect it going forward, Seal and Go is also a breathable sealer which is important on these older floors which may not be protected from damp.

Victorian Floor After Cleaning and sealing
 

Restoring an Old Victorian Floor stained with Bitumen in Yorkshire

Victorian Tiled Floor stained with Bitumen in Heckmondwike Read More »
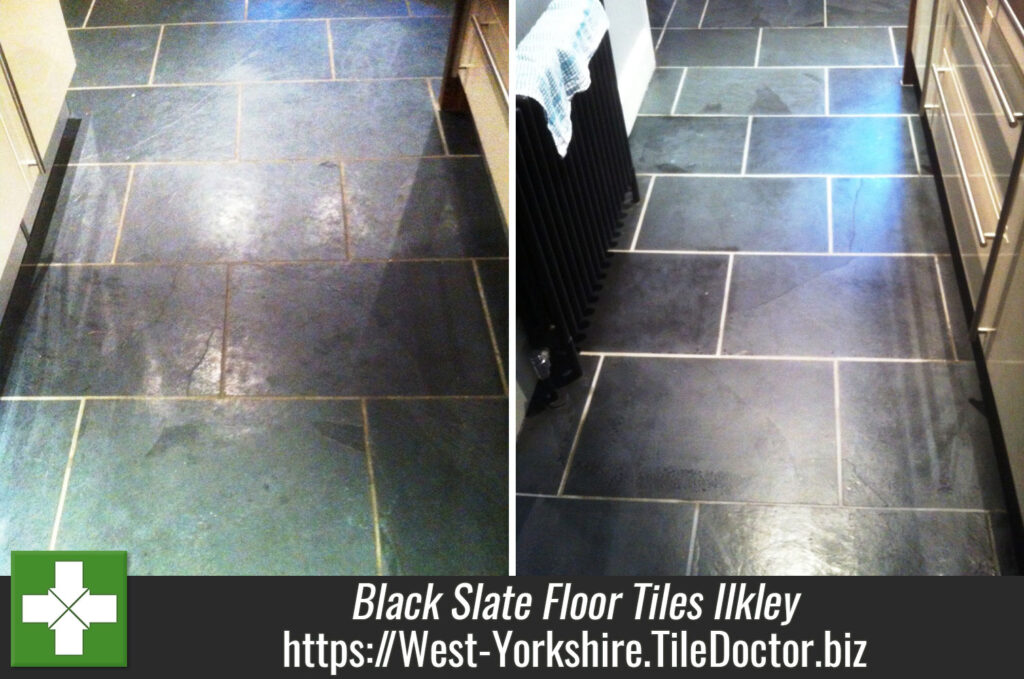
Black Slate floor Ilkley Before and After

Cleaning and Sealing Black Slate floor tiles in Ilkley

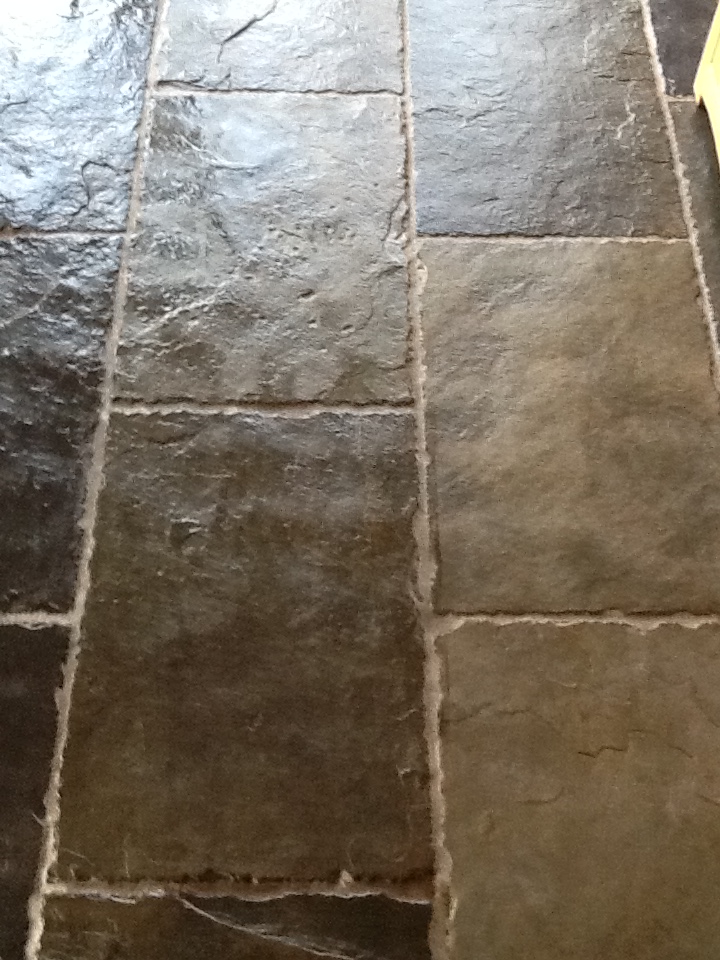
Details below of a slate floor we cleaned and sealed in the kitchen of a house in Ilkley, West Yorkshire. You can see from the photographs that the large Black Slate floor tiles were looking dull and the grout had become soiled with ingrained dirt.

Black Slate floor Ilkley before Black Slate floor Ilkley before

Cleaning Black Slate Tile Flooring

To remove the remaining sealer and dirt from the Slate Floor Tiles I used a solution of Tile Doctor Remove & Go mixed 50/50 with Tile Doctor Nanotech Ultra-Clean agitated with a rotary scrubbing machine fitted with a scrubbing pad. The grout was particularly stained and given the scrubbing machine isn’t as effective on the grout lines it was necessary scrub in Tile Doctor Pro-Clean Tile and Grout cleaner into the grout lines by hand using a grout scrubbing brush. The floor was then washed down with water to neutralise it and remove any remaining cleaning solution prior to sealing, it had take all day to clean the floor so we decided to let it dry overnight and come back the next day to seal.

Sealing Slate Tile Flooring

The Slate was sealed with several coats of Tile Doctor High Shine Sealer which provides a good combination of stain protection together with a high-sheen finish. Slate needs four to five coats and it’s necessary to let it dry between coats this step can take some time to complete. You can see the different in the photograph below; also notice how the sealer has given the floor a lift; the sealer will also protect the grout from further staining.

Black Slate floor Ilkley After
 

Black Slate floor cleaned and sealed in Ilkley

Cleaning and Sealing Black Slate floor tiles in Ilkley Read More »

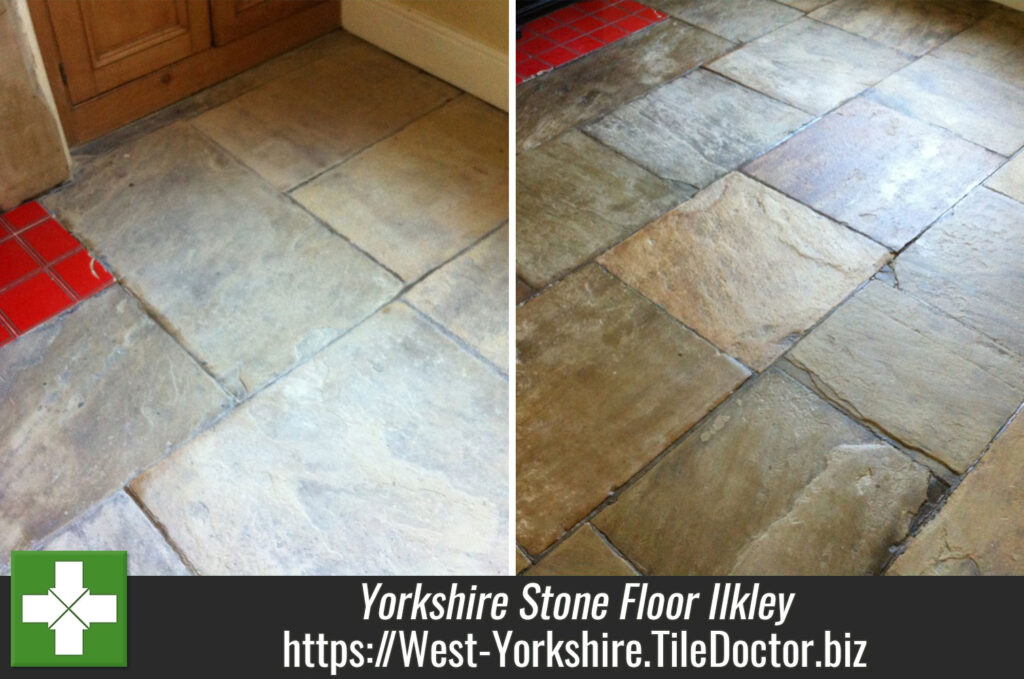
Yorkshire Stone floor in Ilkley West Yorkshire Before and After cleaned and sealed

Cleaning and Sealing a Yorkshire stone Floor in Ilkley

The owners of this house in Ilkley, West Yorkshire discovered this Yorkshire stone floor hidden under carpet, they had done their best to remove the carpet adhesive and carpet backing but unsatisfied with their efforts decided to get Tile Doctor to complete the job.

Stone Floor after carpet removal in Ilkley
Yorkshire Stone Floor after carpet removal in Ilkley and before cleaning

Cleaning the Yorkshire Stone Floor

To removing the remaining carpet glue and clean up the stone floor I applied mix of Tile Doctor Remove and Go combined with Tile Doctor Pro-Clean. This was left to dwell on the floor for a while before using a rotary machine fitted with a black scrubbing pad to get the stone floor really clean. The machine isn’t a 100% effective on an uneven riven surface so it was necessary to get in with a stiff hand brush afterwards. Once I was satisfied with the condition of the stone floor it was given a sluice down with clean water which was removed using a wet vacuum to make sure no chemical was left on the floor as this could affect the sealer later.

Yorkshire Stone Floor in Ilkley Cleaned and Sealed
Yorkshire Stone Floor in Ilkley after Cleaning and Sealing

Sealing the Yorkshire Stone Floor

Sealing the Stone floor was a relatively straight forward process once the floor was clean and free of any debris etc. The sealer chosen for this floor was Tile Doctor Seal and Go which adds a low sheen whilst providing stain protection. Five coats were applied using a paint pad applicator on a pole, the number of coats you need depend on the porosity of the stone and each floor is different so you need to let each coat dry before proceeding to the next.

Stone Floor after carpet removal in Ilkley
Yorkshire Stone Floor after carpet removal in Ilkley and before cleaning

Cleaning and Sealing a Yorkshire Stone floor in Ilkley

Cleaning and Sealing a Yorkshire stone Floor in Ilkley Read More »

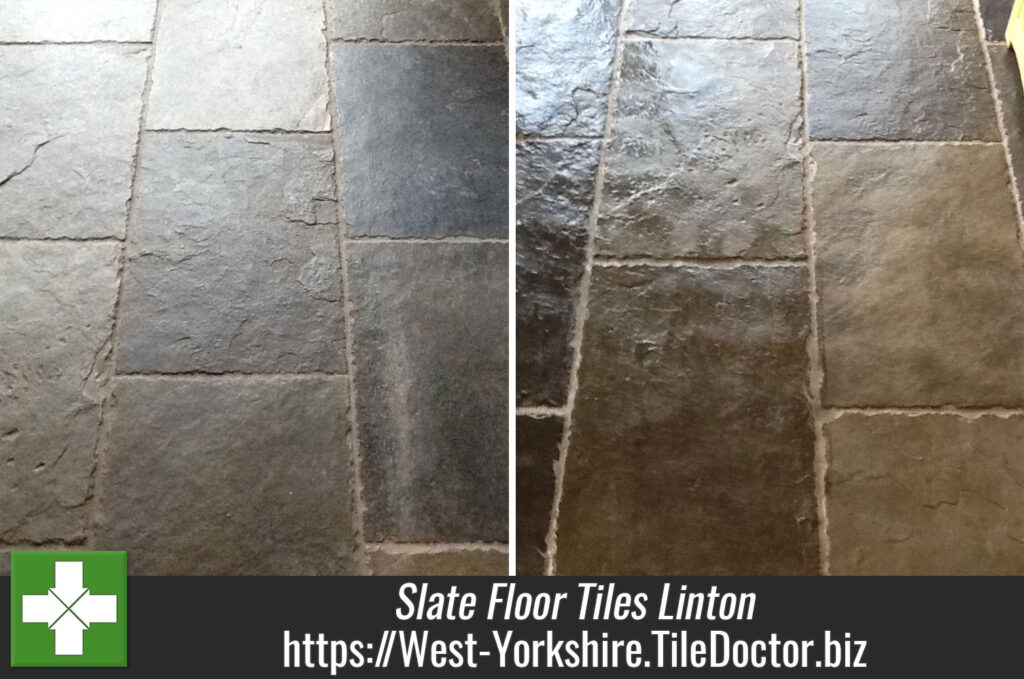
Wetherby Slate Floor Tiles Before and After Cleaned and Sealed

Cleaning and Sealing Slate floor tiles in Linton, Wetherby

Details below of a dirty slate floor in the village of Linton near Wetherby. The large 60 x 40cm Slate tiles were laid in a kitchen with grey grout and covered and area of approximately 10-12sqm.

Dirty Slate Floor Linton Wetherby

Cleaning Slate Tile Flooring

The dirt was removed from the Slate Floor Tiles using a solution of Tile Doctor Remove & Go mixed with Tile Doctor Nanotech Ultra-Clean agitated with a rotary scrubbing machine fitted with a scrubbing pad. The scrubbing machine isn’t as effective on the grout lines so it was necessary to scrub these by hand using a grout scrubbing brush. The floor was then washed down with water to neutralise it and remove any remaining cleaning solution prior to sealing, it had take all day to clean the floor so we decided to let it dry overnight and come back the next day to seal.

Sealing Slate Tile Flooring

The Slate was sealed with Tile Doctor High Shine Sealer which as the name suggests provides a good combination of stain protection together with a high-sheen finish. If you’re doing this yourself I recommend the use of a paint pad which gives a nice even application, slate needs four to five coats and it’s necessary to let it dry between coats. You can see from the photograph below how the sealer really gave the floor a lift and the home owner was delighted with the results.

Wetherby Slate Floor Tiles Cleaned and Sealed
 

Cleaning and Sealing Slate floor tiles

Cleaning and Sealing Slate floor tiles in Linton, Wetherby Read More »

Old Quarry Tiles Otley Repaired cleaned and resealed

Quarry Tile Floor Restoration in Otley

This Red and Black Quarry Tiled floor in the West Yorkshire village of Otley was 90 years old and in serious need of the Tile Doctor treatment, you can see from the photographs that not only was it in need of a good clean there were a number of tiles missing and replacements had to be sourced and fitted.

Old Quarry Tiles Before Repair and cleaning Quarry Tiles in Otley with missing tile

Quarry Tile Cleaning

Fortunately Quarry Tiles are still popular so finding replacement wasn’t too much of a problem. We fitted the tiles and grouted them working carefully to ensure they would match the existing. Once this was done we were able to start the cleaning process which involved scrubbing the quarry tiles with a diluted solution of Tile Doctor Pro-Clean which is a strong multi-purpose alkaline cleaning product specifically designed for cleaning tile, stone and grout. For the stubborn areas we mixed the Pro-Clean 50/50 with Tile Doctor Nanotech Ultra-Clean which provides extra cleaning power. The last step before sealing was to wash the floor down with clean water in order to remove any trace of cleaning products that could upset the sealer.

Old Quarry Tiles Repaired cleaned and sealed Old Quarry Tiles Otley Repaired cleaned and resealed

Quarry Tile Sealer

Once the Quarry Tile floor was dry we sealed it four coats of Tile Doctor Seal and Go which is a water based low sheen breathable sealer that will provide stain protection. You can see the difference from the photographs, quite a transformation I think you will agree,

Red and Black Quarry Tile Restoration in Otley, West Yorkshire

Quarry Tile Floor Restoration in Otley Read More »

Travertine cleaned and sealed as good as new

Cleaning and Sealing a Honed Travertine Tile Kitchen Floor

The photographs on this page are from a Honed Travertine Tile floor in the Kitchen of a house near Keighley. The travertine was in such a bad condition that the customer was considering replacing the tiles at the cost of thousands. Fortunately he discovered Tile Doctor and we were able to restore the floor at a fraction of the cost.

Honed Travertine in need of a deep clean Honed Travertine before cleaning

Cleaning Honed Travertine Tile

We cleaned the floor using Tile Doctor Pro-Clean which was left to dwell for 15 minutes before being worked in with a rotary machine fitted with a scrubbing pad. Once clean we washed the floor down with water to remove any remaining chemical and neutralise the floor before cleaning.

Sealing Honed Travertine Tile

Once dry we sealed the floor with Tile Doctor Colour Grow which brings out the colour in the tile as well as providing excellent stain protection.

Travertine cleaned and sealed as good as new Travertine in Kitchen near Keighley after cleaning


Cleaning and Sealing Honed Travertine Tiles in Keighley

Cleaning and Sealing a Honed Travertine Tile Kitchen Floor Read More »

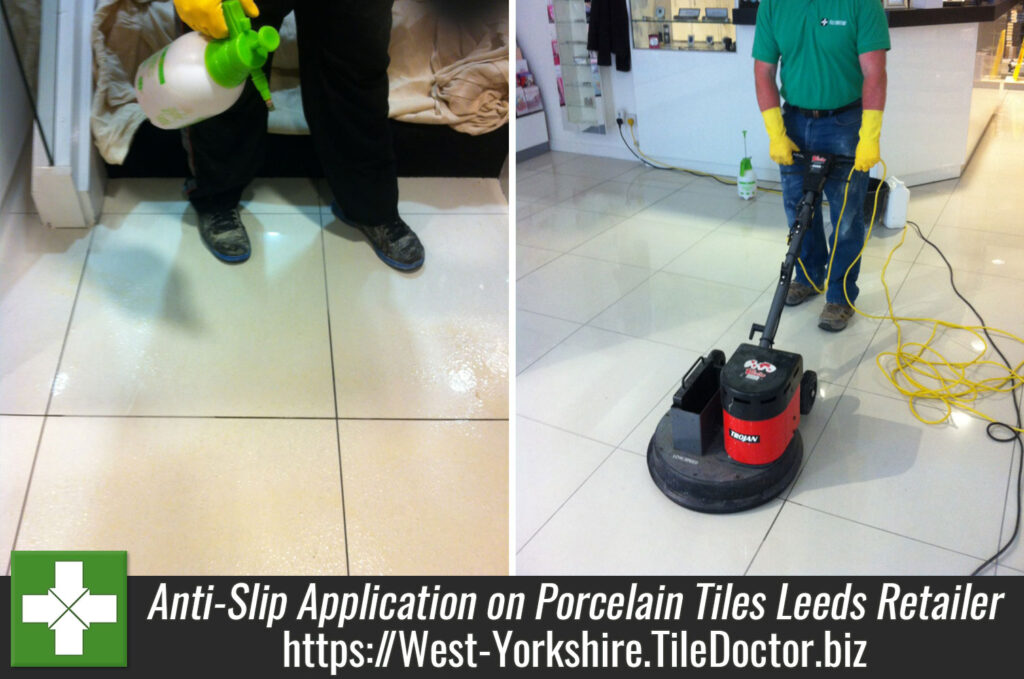
Appying Anti-slip solution to Polished Porcelain

Applying Anti-Slip on Polished Porcelain Tiles at a Leeds Retailer

Polished Porcelain is very hard wearing and looks great in the retail environment; it does however get very slippery when wet and given the increase in accident claims in the UK and companies happy to pursue them it can be a real problem. Prevention with an Anti-Slip solution is definitely cheaper than a court case and this is the very problem we were asked to address at a shop in Leeds recently.

Anti-slip for the Polished Tiles

Applying Anti-Slip to Polished Porcelain Tiles

This floor in a retail outlet in Leeds was laid with white Polished Porcelain tiles and the retailer was keen to prevent accidents happening to their customers. First we treated the area with Anti-slip cleaner to make sure the floor was free from dust and dirt contaminants before the Anti-slip solution was applied.

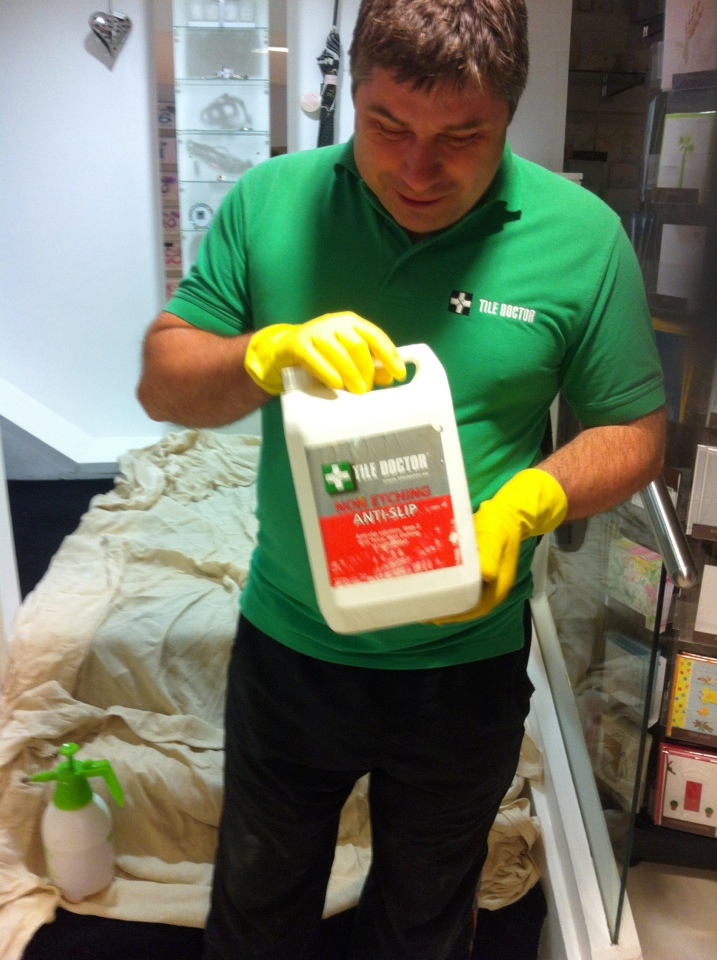
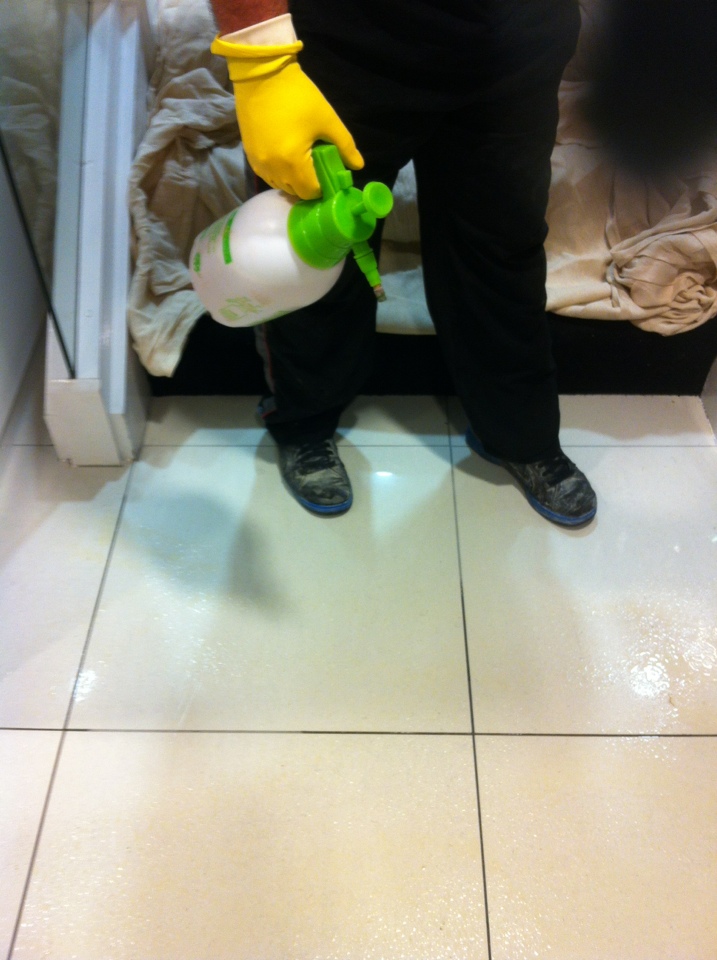
We then applied Tile Doctor Anti-Slip with a spray pump bottle and lightly scrubbed this in, left it on the floor area for the correct time duration and then applied the bonding agent on top of this.

Appying Anti-slip solution to Polished Porcelain
The last step was to buff the floor with a black buffing pad attached to our Victor floor buffer; afterwards we rinsed the floor with water and removed the water using a wet and dry Vax machine.

Buffing Polished Porcelain After Anti-Slip Application
The effects of Anti-slip work as soon as the floor has been buffed, rinsed off and left to dry, needless to say the customer was very happy with the results and left the following message.

Just wanted to thank you for sorting an anti-slip treatment for the new porcelain tiles in our Leeds store. The treatment definitely works,(as we found out the first time it rained!!), and the whole process was dealt with efficiently and promptly.
Val Caine (Director).Wish, Bond Street, Leeds.

Applying Anti-Slip at a shop in Leeds

Applying Anti-Slip on Polished Porcelain Tiles at a Leeds Retailer Read More »

=================================

West Yorkshire Tile Doctor

================================= Read More »

Scroll to Top